I use a MacBook (currently with Sonoma 14.7.4) for most technical purposes. When I don’t, I use an iPad Pro. I grew up using Apple products at school and Windows at home. In 2008, I switched from Windows to MacOS at home, and have been using it ever since. I won’t say I’m completely happy with Apple, but it gets the job done. I suspect if I could manage Linux or somesuch, it would be even better, but I’m not quite that sort of girl, y’know?
I’ve been told that the process of fancifying one’s computer is called ricing. A little bit of research tells me this term comes from souping up cars or something, and frankly? The history of the word sounds like it might be a little racist? I really don’t know. It originally referred, as I said, to customizing Asian cars, not computers, and was a perjorative, according to what research I’ve done. Still, people call this ricing. Why do people have to bring racism into everything??!
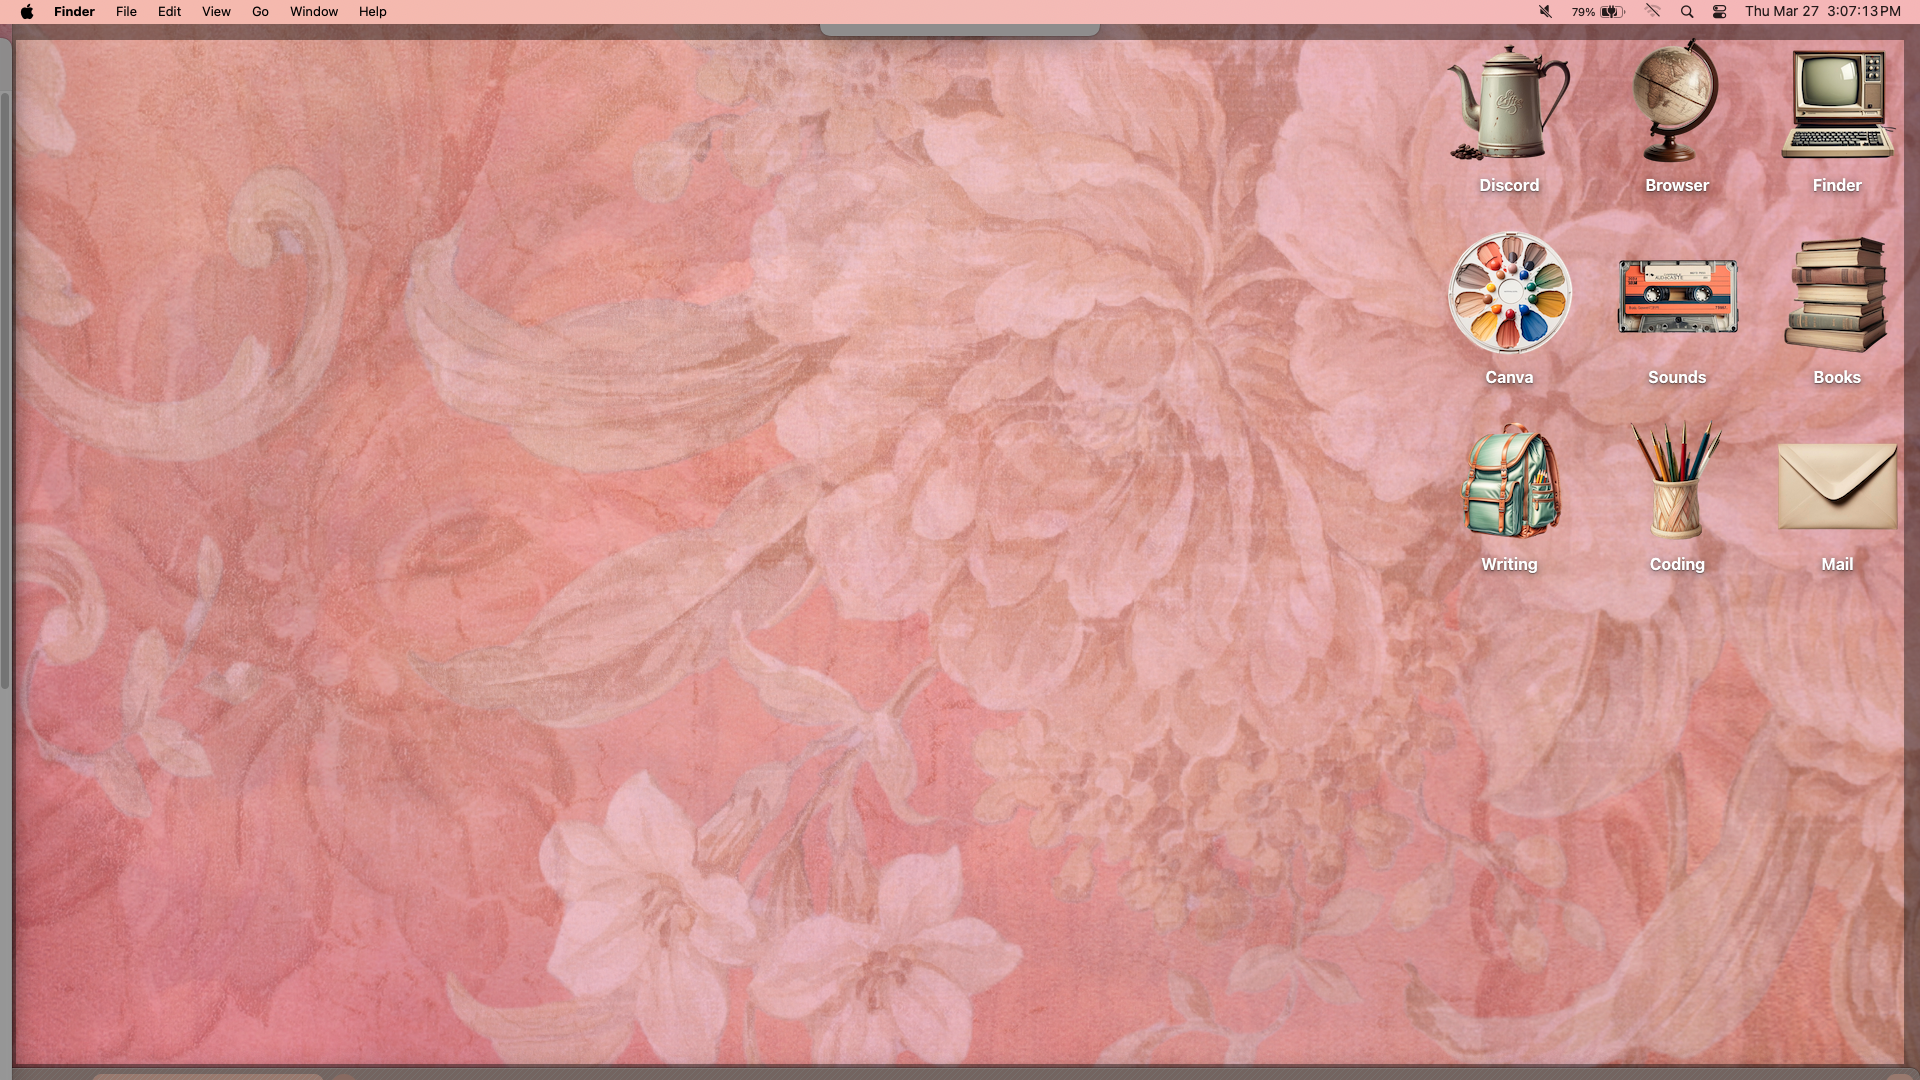
Either way, over the past year, I’ve put some effort into customizing my MacBook Air’s appearance.
I do this both for the aesthetics and because it helps me to keep track of things. If you’re visiting this site here on neocities, you likely are the sort of person who responds readily to aesthetics and may benefit from them for enhanced productivity. Changing default colors, icons, etc all contribute to a more welcoming and easily navigable environment for me on the computer. Maybe you’ll feel similarly, so I’m writing this, describing how I set things up.
Unsurprisingly, MacOS has a limited scope of customization compared (apparently) to the aforementioned Linux, etc. From my perspective, though, the options available are very functional regardless. In particular, you can change icons and color code your folders if you’d like. This sounds simple, but I found it really helpful once I was done. MacOS’s accessibility features can also be useful for tweaking the displays and customization. So, I’d like to explain how this can help make your computer more your own.
Before you begin giving your MacBook or desktop Mac a new theme of sorts, you need an idea of what you’d like. If you have access to Canva or Procreate, or another art program, you can make a background image that your heart desires. You could also find one on Google pretty simply, despite how messy search engines have gotten. Background images are one thing, though - you’ll also want a series of icons to cover your applications, folders, and more.
To do this, though, you obvious need to find a series of icons, ideally matching. For me, I do this on Etsy. I tend to outright purchase icon sets. There are many available if you just search “icon pack.” Some are clearly designed for phones - these are low-resolution and often have opaque backgrounds. I look for the larger ones that are transparent. They will look better on a computer screen, and fit better with the sort of applications one finds on it.

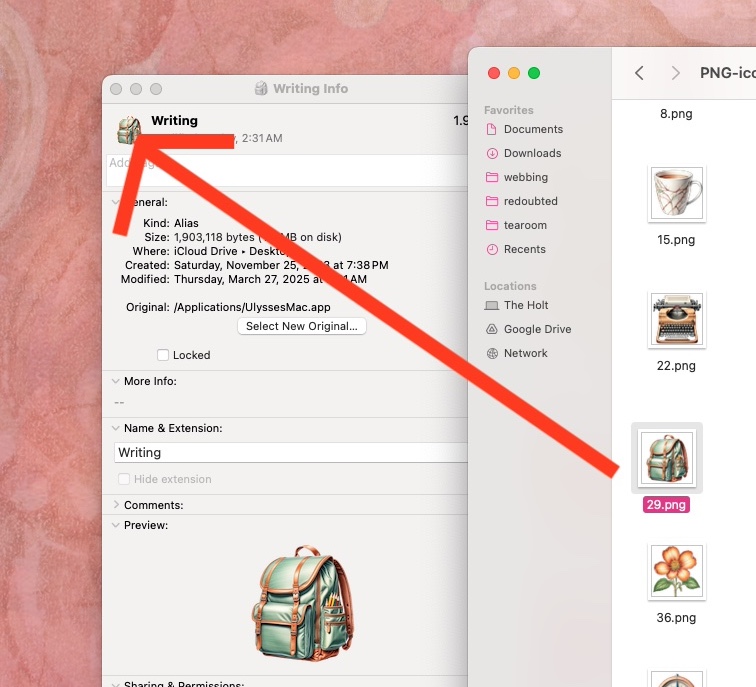
When you come across the perfect icon pack and acquire it, you can start applying each icon to an application on your desktop. Right-click and select Get Info on the application, file, or folder you’d like to cover with an image. Then, drag the image over the small image of the existing icon just in the corner of the window by the file’s title. You may be prompted to enter your computer’s password, but either way, it will change the icon of the file on your desktop or hard drive. Please note: This only works with applications, not the computer’s system tools, etc…
If you’ve adding nice wallpaper perhaps you’ve got places on it where you’d like to put various icons, particularly if you’ve got a lot of them. You can set up different spaces on the computer’s wallpaper for certain applications to help you stay organized. I, however, am more minimalist in that I only keep a few icons on my desktop at any time. Still, you can easily see the potential inherent in doing this, right?

When opening folders themselves outside of the desktop, you can do this too, the same way - just right click, select Get Info on any folder, file, or application, and drag the image you’d like to cover it with over the existing icon in the top corner of the window. I do this with almost every important application or folder on my computer, using whimsical little icons to represent each aspect of my computing experience.

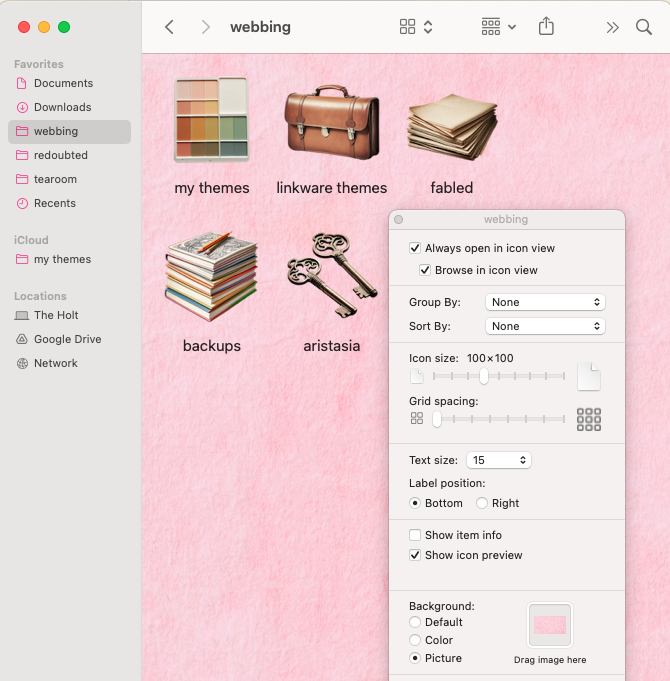
You can also tint folders, you know. Do this by right-clicking within the folder and selecting Show View Options. This will allow you to change the size of the icons as they appear within the folder, their spacing, but also the color of the folder’s background. You can apply this change broadly to all folders, or just to that one. This is immensely useful for knowing which folder you’re in at a glance! You can even us a picture as the folder background…

Another neat way to customize your computer’s appearance? Open system settings by clicking the Apple icon in the top left corner of your screen, of course. Click to the Appearance menu, and choose a default highlight and accent color for your computer. There are limited options for accent colors, but you can choose from the full spectrum for highlight colors.

You can also navigate to the Accessibility menu in Settings and make some changes. This menu is helpful for a lot of reasons, and that includes simply customizing the appearance of your computer. Inside it, you can change the contrast, transparency, and color of the mouse pointer. You could apply a tint to the entire screen, but I don’t do this, personally!
I hope these ideas help you fix up your Mac a bit. I’m sure there are many ways of customization using third party applications that I don’t know, and there are different tricks you could try with this itself, too. Still, I hope this gives you some ideas of what’s possible! Computing has become ubiquitous - that’s undeniable - but not everyone uses a whole computer nowadays instead of a smart phone. If you still do, why not make the most of it??